Looking for reliable painters in Burnside SA for your home, heritage property or commercial premises? Aussie Painters SA provides professional interior and exterior painting services throughout Burnside and surrounding Adelaide suburbs. Burnside is known for its established residential streets, character homes, landscaped properties and significant heritage buildings. The South Australian Heritage Places Database records local and State Heritage Places within Burnside, including historic houses, churches and other significant buildings.
Our painting approach is tailored to the property rather than treating every project the same. Whether you are refreshing an older character home, repainting a family residence, updating interiors or maintaining a commercial property, we focus on careful preparation, suitable coatings and a clean, professional finish.
Is Epoxy Paint Suitable For A Garage Floor?
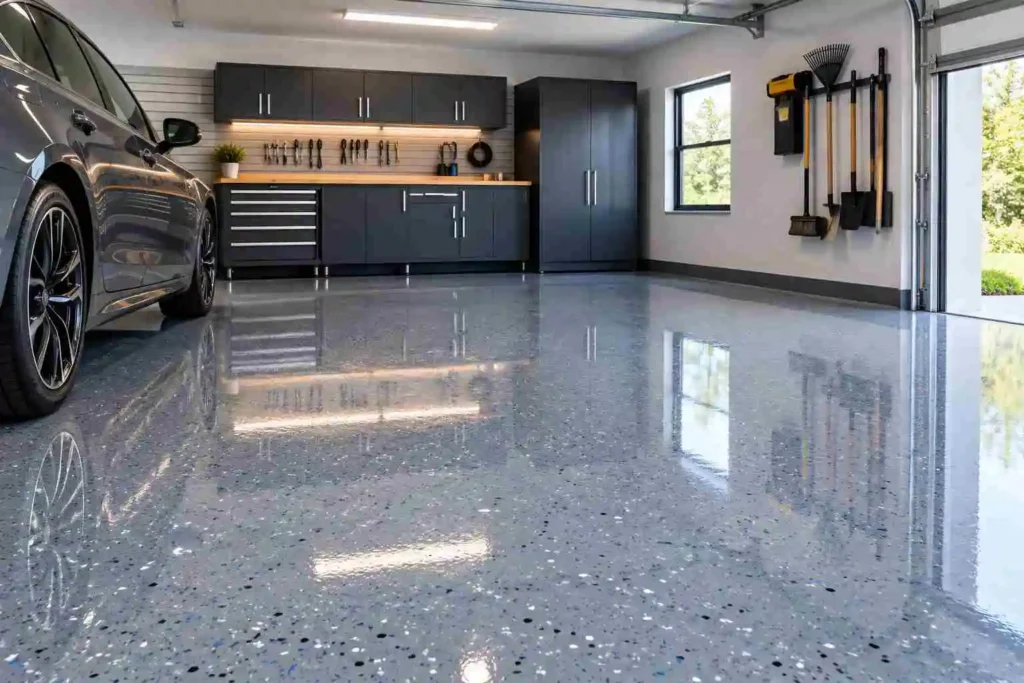
A garage floor needs to handle more abuse than many other painted surfaces. Cars bring in water, dirt and road contaminants, while tools, chemicals, oil and heavy equipment can place additional stress on the concrete. Epoxy is a resin-based coating system designed for properly prepared concrete. Depending on the product and system, it can provide a durable, stain-resistant and relatively easy-to-clean finish. Some systems also incorporate decorative flakes and anti-slip additives for additional texture and appearance.
However, epoxy cannot compensate for a weak or contaminated concrete surface. The preparation underneath the coating is one of the biggest factors in the finished result.
1. Inspect The Concrete Before Painting
Start by emptying the garage and examining the entire floor.
Look for:
New concrete also needs sufficient curing time before an epoxy system is installed. Many products specify around 28 days for newly poured concrete, but the coating manufacturer’s instructions should always take priority. This inspection helps determine whether the slab needs simple cleaning or more intensive concrete floor preparation.
2. Degrease And Deep-Clean The Garage Floor
Oil is one of the biggest enemies of epoxy adhesion. Garage floors often have years of automotive oil, grease, brake fluid and other contaminants embedded into the concrete. Simply sweeping or pressure washing the surface may not remove everything. Apply a suitable concrete degreaser to contaminated areas and scrub thoroughly. Heavily affected sections may require repeated cleaning. After cleaning, remove the residue and allow the concrete to dry completely. Australian DIY guidance similarly recommends degreasing oil stains before moving to the next preparation stage. A clean floor gives the coating a much better foundation.
3. Repair Cracks And Damaged Concrete
Do not use epoxy paint as a substitute for concrete repair. Small cracks, holes and surface imperfections should be cleaned and repaired with a compatible repair material before coating. Larger or actively moving cracks require more attention because simply filling them and painting over the top may not stop the movement from appearing through the new coating. Loose, crumbling or spalled concrete should also be repaired before epoxy application. Coating over unstable material means the epoxy may bond to the damaged surface rather than to sound concrete. The goal is to create a sound, stable and reasonably uniform surface before the coating is installed.
4. Check For Moisture Problems
Moisture is easy to overlook because a garage floor can appear completely dry while moisture is still moving through the concrete. Excess moisture can contribute to blistering, bubbling or adhesion problems in some coating systems. A simple plastic-sheet check can provide an initial indication of moisture, while more formal moisture testing may be appropriate for professional installations.
If moisture is detected, do not simply cover the problem with another layer of epoxy. Determine whether the slab has a moisture issue and select an appropriate solution or coating system.
This step is particularly relevant when dealing with older concrete slabs or garages where moisture transmission may be present.
5. Etch Or Grind The Concrete Surface
Clean concrete is not necessarily ready for epoxy.
The surface needs an appropriate texture or profile so the coating can achieve reliable adhesion. Depending on the floor and the coating manufacturer’s requirements, this can involve concrete etching or mechanical grinding. Acid etching can open the surface of suitable bare concrete, while diamond grinding can mechanically remove contaminants, old coatings and weak surface material while creating a consistent profile. Professional epoxy systems commonly use mechanical grinding because it provides controlled surface preparation. However, not every coating requires exactly the same method, so the manufacturer’s specifications should determine the preparation process.
After preparation, remove all dust and residue before coating.
6. Apply An Epoxy Primer If The System Requires One
Some epoxy systems use a primer as the first coating layer. A suitable primer can improve adhesion and help establish a consistent base for the main epoxy coat. It may also help seal the prepared concrete and reduce problems associated with the substrate. The primer should be mixed and applied according to the product instructions. Do not assume that every epoxy kit requires a separate primer; coating systems differ.
7. Apply The Epoxy Paint Correctly
Once the concrete is prepared, the main epoxy coating can be applied.
Two-part epoxy products normally combine a resin component with a hardener. Accurate measuring and thorough mixing are essential because the chemical reaction between these components is what allows the coating to cure. Once mixed, epoxy has a limited working period, often called its pot life. This means the work should be organised before mixing begins. Apply the coating evenly with the recommended roller or squeegee, keeping a consistent film thickness. Work methodically so that edges, corners and larger open areas receive uniform coverage. Temperature matters too. Epoxy can cure faster in high temperatures and slower in cold conditions, so always follow the product’s recommended application range.
8. Add Decorative Flakes And Anti-Slip Texture
If you want something more attractive than a plain colour, decorative flakes can be broadcast into the wet coating. Flake finishes can add visual interest while also providing surface texture. They are available in different colour combinations, allowing the garage floor to complement the surrounding space. An anti-slip additive can also be incorporated where additional traction is required. This can be useful because a smooth coating may become slippery when exposed to water or other liquids. Products and systems vary, so use an additive that is compatible with the selected coating.
9. Give The Floor Enough Time To Cure
One of the easiest mistakes is using the garage too soon.
A surface may feel dry before the epoxy has developed its full hardness. Foot traffic, vehicle weight and chemicals can all affect a coating that has not cured sufficiently. Cure times vary considerably between products and environmental conditions. For example, one manufacturer specifies different waiting periods for foot traffic and vehicles, demonstrating why the product’s own instructions should be followed rather than relying on a generic number.
Keep vehicles and heavy equipment off the floor until the recommended vehicle-use time has passed.
10. Maintain The Epoxy Garage Floor
Once fully cured, an epoxy garage floor is relatively straightforward to maintain.
Sweep regularly to remove grit and dirt that can gradually abrade the surface. Clean spills promptly, particularly automotive fluids and chemicals. For routine cleaning, use a mild cleaner that is suitable for the coating. Avoid aggressive chemicals, abrasive tools or cleaning products that the manufacturer does not recommend. Regular maintenance is simple, but it helps preserve the appearance and performance of the garage floor coating.
Common Mistakes When Painting A Garage Floor With Epoxy
Many epoxy failures are caused by preparation rather than the coating itself.
Common mistakes include:
In Adelaide, hot conditions can also shorten the working time of some epoxy products, while temperature changes can affect curing. Planning the application around the coating manufacturer’s requirements is therefore important.
Professional Garage Floor Painting In Adelaide
A successful epoxy garage floor starts long before the first roller touches the concrete. Cleaning, degreasing, crack repair, moisture assessment, surface preparation and correct application all contribute to the final result. If you’re considering painting a garage floor with epoxy paint in Adelaide, Aussie Painters SA can assess the existing concrete and recommend a suitable preparation and painting approach for your property. Whether the goal is a cleaner workshop, a more attractive residential garage or a tougher surface for everyday use, proper preparation helps give your new garage floor the foundation it needs.
Ready to improve your garage floor? Contact Aussie Painters SA for professional painting advice and a quote in Adelaide.